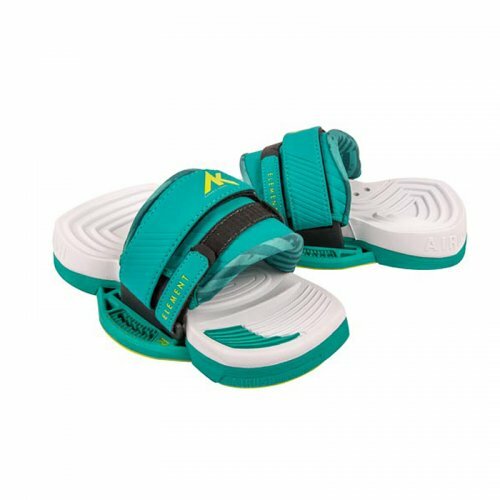
How to fit kitesurf board footstraps
If you have just got your first twin tip kiteboard and it doesn't have the straps fitted, you will see that there are two or three stance width options and a bunch of options for setting the angle of your straps. To get a a rough idea which of the stance options you will choose, set your board down on something that wont scratch it up and step onto the board as though you were kiting. As a general rule you want your feet about shoulder width apart, to give yourself a nice stable position on the board.
Take a look at the metal threaded mounting inserts in the deck. These inserts are often offset to put the straps at a more natural stance with the toes of your feet pointing apart. This is called the 'Duck' or the Duck Stance. More duck means your toes point away from each other more. Jump up and down (not on your board) and have a look at how much your toes naturally point out and use this to guide the amount of duck you set your straps with. The offset on the inserts dictates which is the heal side of your board, if there is no offset you can pick which way around you want to build your board. I find it easiest stand to the heal side of a board when I'm putting on the straps.
Pads and straps have a left and right, just like shoes. There will be arch support on the inside of the footbed, so you know which foot they are for. Some brands will label which side they belong. If the straps are not attached to the pads already, and there is no other indication to which side they go, the widest part of the strap goes to the inside of your foot. The shaping when you bend them over to bolt them down will be more open where your foot goes in and tighter over the toes to hold your foot in place.
Now you know where you want the pads and straps to go, its worth doing a couple of checks before you bolt them on. Firstly take one of your mounting bolts and look at the thread. Kiteboards use two different thread pitches on different brands, either M6 or ANC 1/4". Check you have the correct bolts by gently threading them into the insert on your board with your fingers. There should be no resistance and you should be able to screw the bolt down to the bottom of the insert. This tells you that you have the right bolts and there's no resin, polish or swarf in the inserts. It's very important to check the threads because the inserts in the board can't be replaced if you mangle them up.
Put your pads on and do up the bolts till they are snug. Always use the right screwdriver so you don't damage the heads. Its worth noting that some brands of boards are MUCH easier to build than others. Ensure the bolts don't get cross threaded and that they go in straight. If you are in ANY doubt, get us to build your board for you. Put your feet in the straps and adjust if anything doesn't feel right, then do the bolts up firmly. You can do up the adjustment on the straps if you want, but I guarantee that you will need to tweak them again after a couple of runs on the water!
After your first session you will probably need to check the bolts are still tight. It's worth checking this every few weeks if you ride regularly. You can use thread lock, but check it's one that can be loosened without heat.
Dont be afraid to experiment with your strap positions. Just check there is no sand in the threads if you change position.
